This article presents a comprehensive engine mount design guide, drawing on practical experience from both aerospace and high-performance automotive sectors. Whether you’re a car enthusiast planning an engine upgrade or an engineer requiring custom industrial equipment mounts, this guide will walk you through the entire process from concept to finished product.
Strategic Planning Before Design
Define Application Scenarios and Load Requirements
In the dozens of mount projects I’ve worked on, the most common mistake is jumping straight into drafting. The first step in engine mount design is always understanding its operational environment.
Requirements vary dramatically across industries and vehicle types:
On-road vehicles: Primarily focus on NVH (Noise, Vibration, Harshness) performance during daily driving
Off-road/Agricultural Machinery: Must withstand extreme impacts and mud/dust environments
Aerospace: Must comply with airworthiness regulations like FAR 23.361/363, accounting for gyroscopic moments and turbulence loads
Take my recently completed 750SDX off-road aircraft project as an example. We not only calculated the engine’s weight but also accounted for all accessories—including the turbocharger, heat exchanger, and exhaust piping—along with their weight and CG positions. These data points directly determine the force distribution across the mount.

Collecting Critical Data
Before any design work begins, you must have the following data prepared:
| Data Categories | Specific Content | Source |
| Engine Interface | Mounting point coordinates, bolt specifications, locating pin positions | Engine Technical Manual or 3D Scan |
| Body/Firewall Interface | Mounting point location, angle, structural strength | Body drawings or measured data |
| Powertrain data | Weight, center of gravity, moment of inertia | Measured or OEM data |
| Peripheral space | Clearance for exhaust manifold, steering gear, and suspension tower top | Actual vehicle measurement or 3D scanning |
| Vibration characteristics | Engine idle speed, fundamental frequency | OEM or test data |
In the Spacewalker-II project, the customer requested moving the engine forward by 20 inches to address a rearward center of gravity issue. We spent an entire week building precise 3D models and simulating stress distributions on the original mounts before daring to design a new solution. This lesson is worth sharing: Spend an extra day measuring, save ten rounds of welding modifications.
In-Depth Analysis of Core Design Elements
Bracket Type Selection
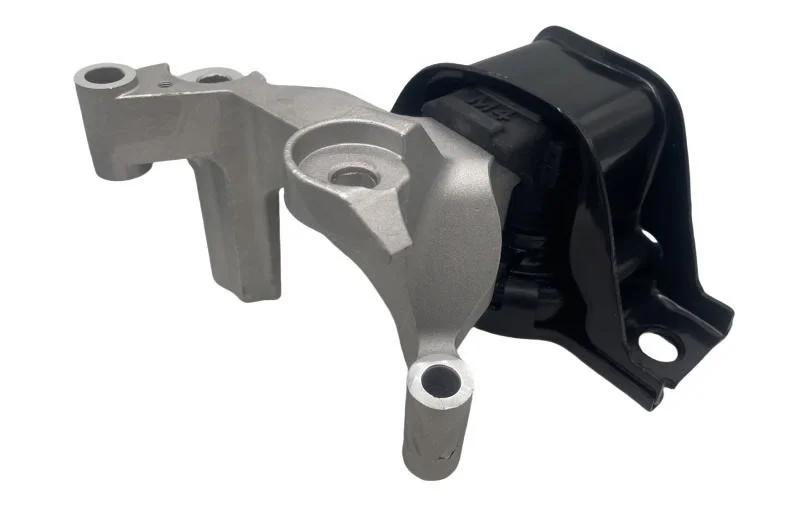
In my experience, selecting the right bracket configuration can make all the difference. Here are common types and their suitable applications:
Center-Bonded Mount
Suitable for: Stationary equipment, generators, etc.
Features: Simple structure, low cost, provides basic tensile support
Tapered Bracket
Suitable for: High-load equipment, heavy machinery
Features: High load capacity, excellent vibration damping
Hydraulic Support
Application: Passenger vehicles with four or more cylinders
Features: Dissipates vibration energy through fluid flow, delivering optimal NVH performance
Two-piece mount
Application: Complex mounting scenarios requiring multi-directional force control
Features: Two rubber bases independently absorb vibrations from different directions
In aerospace, another critical consideration is single- vs. dual-mount systems. Take the Rotax engine, which typically requires both an “engine ring mount” and a “manufacturer mount.” However, for the SR-1 project, we designed an integrated single mount to reduce weight and achieve a compact layout, directly integrating the damper at the firewall end. This decision reduced the overall weight by nearly 3 kilograms.
The Secret to Selecting Rubber Materials
Rubber is the soul of the mount. Choosing the wrong material renders even the most precise metalwork futile.
| Materials | Advantages | Disadvantages | Typical applications |
| Natural Rubber | Excellent elasticity, good tear resistance | Poor oil resistance, not heat-resistant | Passenger car engine mounts |
| Neoprene | Good oil resistance and weather resistance | Hardens at low temperatures | Industrial equipment, agricultural machinery |
| Silicone Rubber | High and low temperature resistance (-60~200℃) | Lower strength, higher cost | Aircraft, high-performance vehicles |
| EPDM | Excellent ozone and weather resistance | Not oil-resistant | Chassis bushings, body mounts |
In the Miata engine mount project, we insisted on using the original OEM rubber mounts rather than redesigning the rubber components. This is a crucial principle: don’t reinvent the wheel—OEMs have invested millions of dollars in rubber formulations and fatigue life testing.
Key Design Considerations for Metal Components
Material Selection
Aviation-grade 4130 chromium-molybdenum steel is my preferred choice for critical projects. It offers an excellent strength-to-weight ratio and welds well. For standard automotive modifications, 1020 low-carbon steel with proper heat treatment is entirely sufficient.
Wall Thickness and Diameter
During the Spacewalker-II extension bracket design, we found the original 0.75-inch tubing lacked sufficient stiffness. After iterative analysis, we finalized a 1.00-inch OD, 0.063-inch wall thickness 4130 steel tube. This solution met stiffness requirements while adding less than 2 pounds of weight.
A Critical Detail: Vent Holes
All welded-closed tubing must have a small vent hole drilled to allow hot air to escape during welding. Otherwise, trapped hot air can erupt from the weld pool, causing porosity or even burn-through. This vent hole can be sealed later with a plug weld.
The Engineering Mathematics of Vibration Isolation
This is the most expertise-intensive part of the entire design. Skipping this step risks the mount resonating and fracturing at certain rotational speeds.
Core objective: Ensure the engine’s excitation frequency avoids resonance with the bracket system’s natural frequency. Typically, the minimum operating speed must be at least three times the system’s natural frequency (i.e., frequency ratio > 3).
Simplified calculation formula:
For a system with mass m and support stiffness k, the natural frequency f₀ is: f₀ = (1/2π) × √(k/m)
A more practical empirical formula (based on static compression δ, in mm): f0 = 15.76 / √δ
This implies: To achieve an isolation rate exceeding 90% at idle speed, the static compression must reach approximately 3mm.
Six-Degree-of-Freedom Analysis
Actual engine motion is complex—it translates along the X, Y, and Z axes while rotating around all three. During design, I typically use FEA software for modal analysis to ensure all six rigid-body modes’ frequencies avoid primary excitation frequencies (usually engine ignition orders).
Complete Process from Design to Physical Prototype
Building the 3D Model
In SolidWorks or similar CAD software, I first build a precise engine model (including at least mounting points, oil pan, exhaust manifold, alternator, and other key contours) alongside firewall/subframe models.
Key technique: Create a “dummy engine”—a simplified 3D model containing mounting points and primary contours, but with significantly reduced computational load compared to the full model. This enables rapid iteration of mounting bracket designs.
Clearance Check: Simulate engine displacement under various operating conditions (typically rubber mounts allow ±5mm movement) within the model to ensure no interference with surrounding components under any scenario.
Finite Element Analysis
In the SR-1 project, initial FEA results revealed stress concentrations at specific weld nodes. By increasing local pipe diameter and adjusting angles, we reduced peak stress from 40 ksi to 23 ksi.
Analysis Key Points:
Load Conditions: Consider at minimum vertical overload (+3g/-1.5g), horizontal overload (±1.5g), torque load (maximum torque × dynamic factor), and gyroscopic forces (rapid pitch/yaw).
Boundary Conditions: Fixed at firewall end; load applied at engine end
Result Interpretation: Focus on hotspot areas, particularly near welded joints. Note that idealized welds in FEA differ from actual welds; maintain a minimum 1.5x safety factor.
Fabricate welding fixtures
This is the step most beginners overlook, yet it’s what experienced professionals prioritize most.
For the Miata bracket project, we fabricated a simple yet precise fixture: a steel plate representing the firewall, plus locating blocks for the engine mounting points. All tubing was spot-welded in position within the fixture to ensure geometric accuracy.
For the 750SDX project, the fixture was more complex: it had to simultaneously simulate the firewall’s angle (requiring engine tilt and rightward offset) and the engine’s precise position. We spent two full days fine-tuning the fixture, but this made subsequent welding exceptionally smooth.
The core principle of jigs: position all tubes correctly before welding, rather than forcing corrections during the weld.
Tube Cutting and Pre-Processing
Manual measurement and cutting for complex brackets is prone to errors. For the SR-1 project, we exported the model as a cutting list and sent it to VR3, a professional CNC tube cutting service. Their cutting precision was within 0.01 inches, and all tubes fit together perfectly like a jigsaw puzzle.
If manual cutting is necessary, use an online pipe intersecting line generator (e.g., metalgeek.com), print the template, and apply it to the pipe before cutting.
Pre-processing steps:
Acetone cleaning
Scotch-Brite abrasive cleaning of weld areas
Temporarily spray with WD-40 rust inhibitor (if welding won’t occur immediately)
Welding Process
Welding Key Points:
TIG welding is preferred for minimal heat-affected zone in chromium-molybdenum steel
Minimize pipe butt gap as much as possible; excessive gap requires excessive filler metal, reducing strength
Weld symmetrically to prevent distortion
After completing all welds, clean the area again and apply rust-preventive primer.
Testing and Validation
Welding completion is not the final step. Before vehicle assembly, verification must be conducted:
Dimension recheck: Verify all mounting point positions on the fixture.
Engine trial fit: Support the engine with a jack, lower it slowly, and verify smooth bolt alignment
Static Load Testing: Apply simulated loads at critical points and measure deformation (mandatory for aerospace projects)
Common Issues and Mitigation Strategies
The Primary Cause of Bracket Fractures
In the failure cases I’ve reviewed, bracket cracking typically stems from:
Stress Concentration: Insufficient angles at pipe intersections or lack of gusset plate reinforcement
Welding Defects: Lack of fusion, undercut, or absence of vent holes causing porosity
Material Fatigue: Failure to properly account for cyclic loading or insufficient safety factors
Improper Bolt Preload: Hollow structures lacking sleeves, causing crushing during tightening
Solution: Install sleeves at hollow subframe mounting points to transfer clamping forces through the sleeves rather than crushing thin-walled structures.
Troubleshooting Excessive Vibration
If abnormal vibration is felt after vehicle assembly, inspect in sequence:
Does the natural frequency of the mount overlap with the idle vibration frequency? Frequency tuning can be achieved by increasing stiffness or mass.
Are rubber components excessively aged or incorrectly selected?
Are engine accessories rigidly connected to the body (e.g., exhaust pipe hangers, intake manifolds)? These represent “short-circuit” paths for vibration transmission.
From Engineer to Solution Provider
Reflecting on every mount project I’ve worked on—from the SR-1 race car to the MGB powering a Miata, from Spacewalker-II center-of-gravity correction to 750SDX off-road reinforcement—I’ve grown increasingly convinced: Excellent engine mount design is 70% science, 30% craftsmanship, and 100% obsession with detail.
If you’re planning a project requiring custom mounts, you have two paths:
Option A: Spend dozens of hours teaching yourself FEA, buy stacks of tubing for trial-and-error, enlist a welder friend, and pray it fires on the first try. This path offers immense satisfaction but can be fraught with setbacks.
Option B: Leave the expertise to the experts. We offer a one-stop mount solution from design and analysis to prototype manufacturing. Whether you need to fit an unconventional engine into a classic car or design heavy-duty mounts for industrial equipment, our proven engineering methods will help you avoid every pitfall I’ve outlined in this article.
Our Service Process:
Free Initial Consultation: Understand your project requirements, engine model, and chassis type
3D scanning/data acquisition: Precisely capture mounting point coordinates
Concept design + finite element analysis: Provide multiple solution comparisons
Prototype Manufacturing: CNC-cut tubing with professional welding
On-site Installation & Calibration: Provide field support to ensure perfect fitment
Iterative Optimization: Adjustments based on test feedback
Contact us today for a free project assessment. Share your engine model and chassis specifications, and we’ll deliver a preliminary proposal and quote within one week. Get your conversion project on the right track from the start.
FAQ
Q1: Can engine mounts be entirely custom-made, or must they be purchased ready-made?
A: Absolutely possible, but requires CAD modeling, FEA analysis, and welding skills. If off-the-shelf brackets are available, we recommend prioritizing them—they often save time and cost. Custom brackets are ideal for specialized modifications, center-of-gravity adjustments, or performance optimization scenarios.
Q2: How do I determine the mount’s natural frequency?
A: The most accurate method is FEA modal analysis. For rough estimation, use the formula f0 = 15.76/√δ, where δ is the static compression of the rubber component under engine weight (mm). Aim for an idle frequency > 3×f0.
Q3: What wall thickness should be used for the tubing?
A: Depends on load and span. Automotive modifications commonly use 1.5mm-3mm wall thickness; aerospace typically employs 0.049-0.065 inch (approx. 1.2mm-1.6mm) 4130 steel tubing. FEA determination is recommended to avoid overdesigning and adding unnecessary weight.
Q4: Is TIG welding required for bracket fabrication?
A: Yes, especially for chromium-molybdenum steel (4130). TIG welding produces a small heat-affected zone, controllable penetration depth, and high weld quality. Conventional stick welding is prone to defects and is not recommended for critical structures.
Q5: How often should rubber mounts be replaced?
A: Typically every 5-8 years or 80,000-100,000 kilometers. Inspection criteria: Check for cracks, hardening, hydraulic fluid leaks, and excessive static deflection. Aviation applications require inspection during every annual maintenance check.
Q6: What is the “node position” design principle?
A: Ideally, all pipe centerlines should converge at installation points (nodes), forming a hinged truss structure to avoid subjecting pipes to bending stresses. This is the golden rule of aerospace bracket design.
Q7: Does the engine need to retain its original tilt angle?
A: Yes. The factory-set tilt angle typically accounts for transmission system angles and oil pan lubrication. Altering the angle may cause driveshaft vibration or insufficient lubrication.
Q8: How can internal bracket rust be prevented?
A: Spraying inside enclosed tubing is difficult. Options include injecting linseed oil or rust inhibitor before welding (refer to AC 43.13-6-42), or drilling holes at the tube ends and sealing them with plug welding. The professional approach is to purge the air with argon gas after welding.
Q9: Does bracket design affect fuel consumption?
A: Indirectly. Improper design can increase engine vibration, leading to higher internal friction losses. Excessively heavy brackets add vehicle weight, slightly increasing fuel consumption. However, the primary impact is on NVH performance.
Q10: How is the tightening torque for bracket bolts determined?
A: Refer to the original manufacturer’s repair manual. If unavailable, calculate based on bolt grade and diameter, and use threadlocker. Key points: Ensure sufficient bolt elongation. Hollow structures must be fitted with sleeves to prevent crushing.